If you don’t have one – check our guide “How to Create a Google Account.”
If you already have an account – below you’ll find step-by-step instructions on how to add a website to Google Search Console.
1. Go to https://search.google.com/search-console/about , click the “Start” button.
2. Log in to Google Search Console using your Google account.
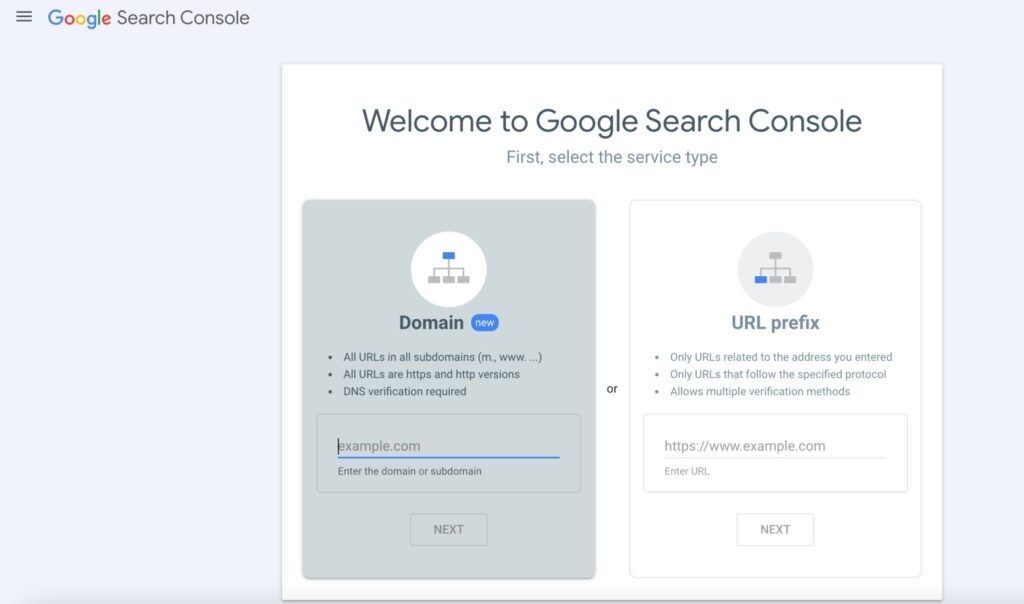
3. You will be greeted by a screen with options for how you want to authorize/add your site to Google Search Console.

What’s the difference?
The first option, domain verification, allows you to get insights into data from all versions of your site in one place. You will see data for all subdomains (if you enter the domain), e.g., www and non-www, as well as all URL addresses in both HTTP and HTTPS versions.
If you add the site as a URL-prefix, you will see addresses only related to the specified URL (i.e., from a given domain or subdomain) and only within the specified protocol – e.g., only HTTP addresses – if you provide a URL with this protocol.
What is a URL prefix? It is the version that the URL takes. We distinguish such prefixes that have a security protocol, e.g.,
https://revamper11com
that do not have an SSL certificate, e.g.,
and those that can have different subdomains – e.g., the www subdomain. In the basic combination, we distinguish the URL in the following prefixes:
Domain verification:
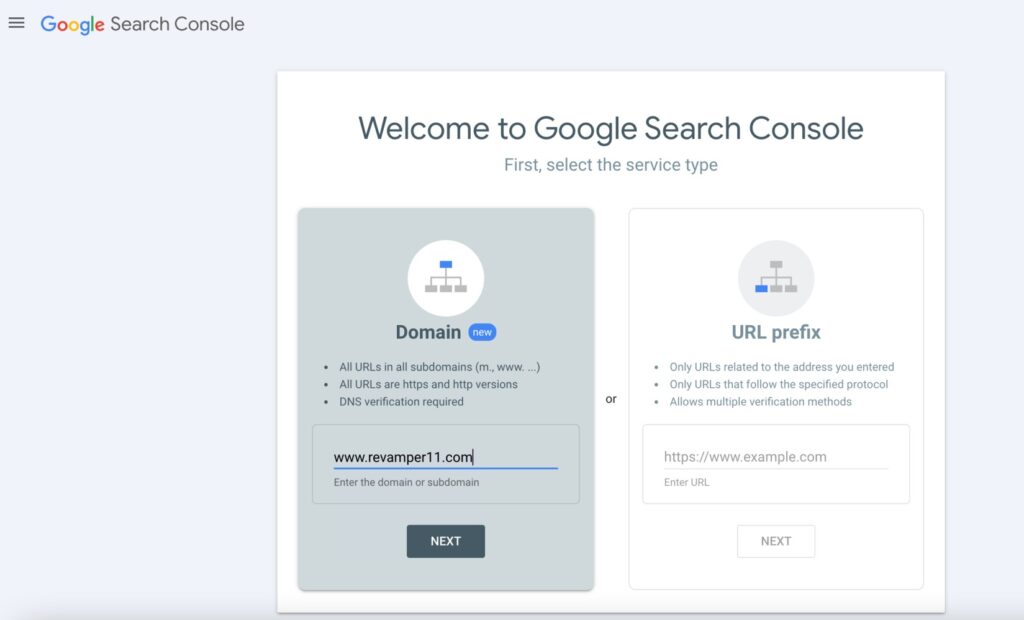
In this case, you must enter the domain or subdomain address (without the https protocol) in the available field, e.g., revamper11.com or console.revamper11.com.

After entering the domain or subdomain, click the “next” button.
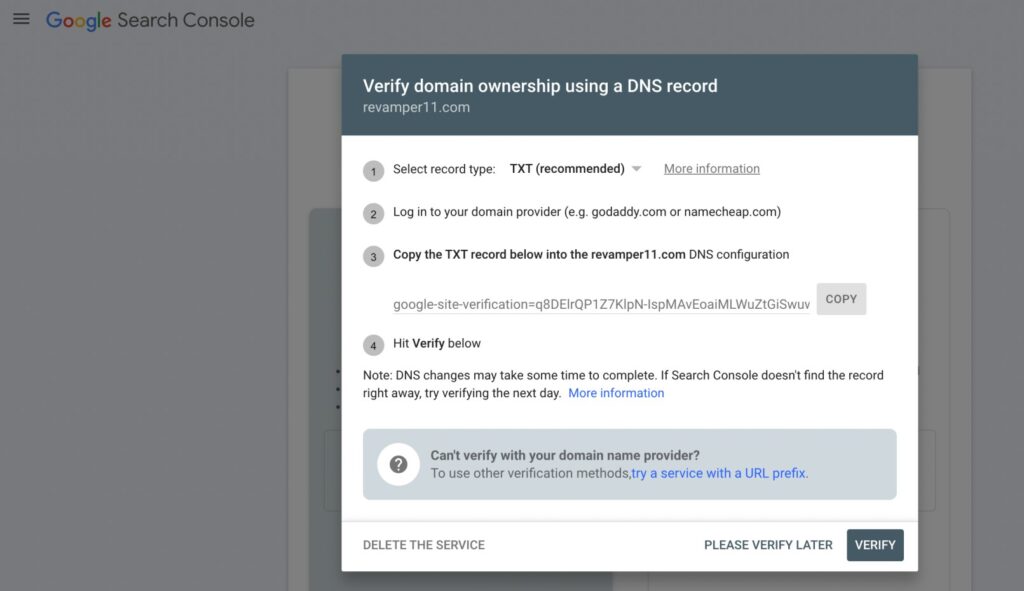
A screen with instructions on adding a DNS record for verification will appear.
First, choose the type of record you will use for authorization – you can use TXT or CNAME (TXT is recommended).

Little known fact
If you use this method for a URL-prefix property, you will also be automatically verified for the domain property.
When choosing this method, you will need to log in to your domain provider to set up the DNS record correctly.
If Search Console provides a TXT record, follow the instructions for manually pasting the record for the specific domain provider.
Little known fact
If you use this method for
Sometimes Search Console automatically recognizes and displays your domain provider in a list. If so, simply select your provider and click Start Verification, then follow the given instructions. You will need to log in to your domain provider, after which verification should occur immediately.
If Search Console shows a domain provider that is not yours, choose any DNS provider from the list and follow the manual domain provider instructions below.
a URL-prefix property, you will also be automatically verified for the domain property.
For manually installed records, it may take up to two or three days for the provider to start serving the record. If you followed the above manual domain provider instructions and verification failed, wait a day or two and try again. To stay verified, do not remove the DNS record from your provider, even after successful verification.
You can also check how Google sees your DNS records using the tool:[https://toolbox.googleapps.com/apps/dig/#TXT/
Enter your domain name in the field at the top, without the protocol or slashes (e.g., revamper11.com).
Click TXT or CNAME, depending on the type of record you are using for verification. (Most sites use TXT records for domain verification).
All DNS records of the selected type found with your provider will be shown at the bottom with a label describing the record type (typically CNAME or TXT).
Look for the DNS record provided by Google Search Console that you were supposed to paste.
For TXT records, the Search Console verification record looks something like google-site-verification=<<some number>>.
For CNAME records, the verification record is a name/value pair where the name includes the domain, and the value includes dv.googlehosted.com.
Your record should exactly match the verification record values given by Search Console.
If you do not see your verification data on the list, wait a day or two and try again.
If you have added the DNS record, go back to Google Search Console – find the service in the top left corner – click on it and then on the “Verify” button. Remember that verification can take several days.
Remember
For a TXT record, leave the name/host field blank and use your TXT string in the DNS record’s value field. For a CNAME record, you are given a name/value pair to use in your DNS record’s name/value fields.
Check out the other methods:
How to Add a Website to Google Search Console using an HTML File
How to Add a Website to Google Search Console using Google Analytics Code
How to Add a Website to Google Search Console via Google Tag Manager / GTM
How to Add a Website to Google Search Console using DNS Record
