If you already have an account – below you’ll find step-by-step instructions on how to add a website to Google Search Console.
1. Go to https://search.google.com/search-console/about, click the “Start” button.
2. Log in to Google Search Console using your Google account.
3. You will be greeted by a screen with options for how you want to authorize/add your site to Google Search Console.
The first option is domain verification, and the second is URL-prefix verification.
What’s the difference?
The first option, domain verification, allows you to get insights into data from all versions of your site in one place. You will see data for all subdomains (if you enter the domain), e.g., www and non-www, as well as all URL addresses in both HTTP and HTTPS versions.
If you add the site as a URL-prefix, you will see addresses only related to the specified URL (i.e., from a given domain or subdomain) and only within the specified protocol – e.g., only HTTP addresses – if you provide a URL with this protocol.
What is a URL prefix? It is the version that the URL takes. We distinguish such prefixes that:
– have a security protocol, e.g., http://revamper11com
– do not have an SSL certificate, e.g., http://revamper11com
– and those that can have different subdomains – e.g., the www subdomain. In the basic combination, we distinguish the URL in the following prefixes:
URL-prefix verification:
There are 5 ways to authorize using the URL-prefix method. Here we show how to do this via Google Analytics.
Authorization using Google Analytics
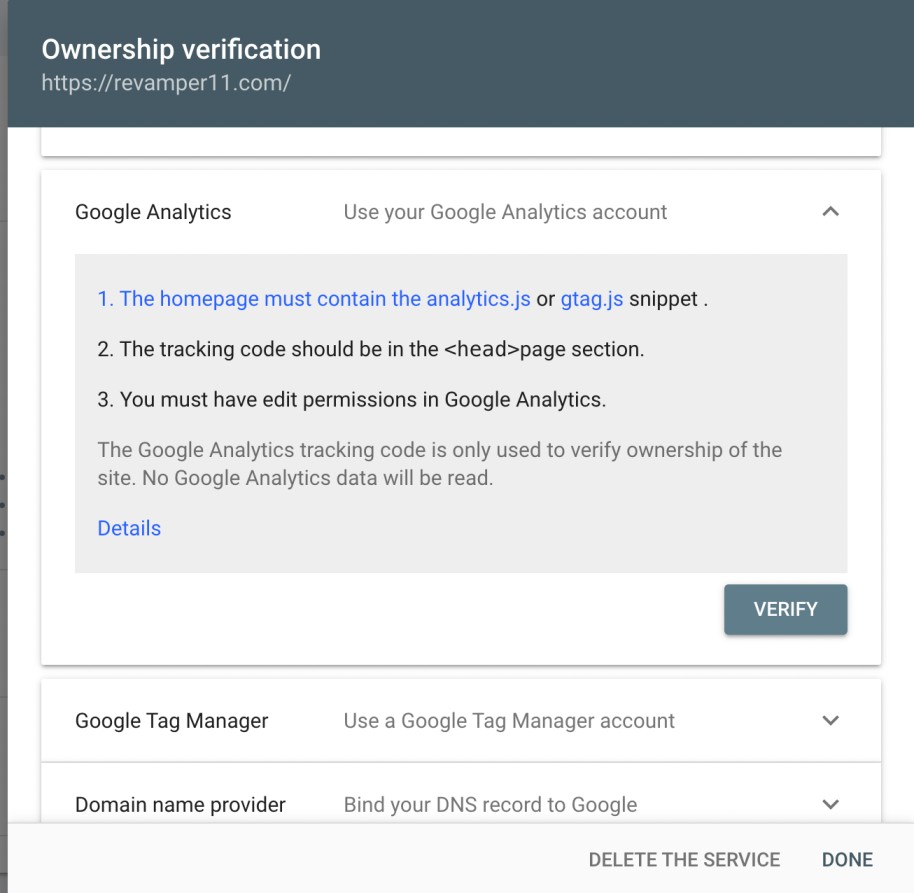
One of the most convenient methods of authorization is using the Google Analytics code. If you use Google Analytics to track traffic on your website and have edit permissions on the account, you can choose this verification method.
Not sure if your site has the Google Analytics code? You can check by viewing the source code and searching (control or command + F) for “analytics.js” or “gtag.js”.
> Step 1
Log in to Google Search Console using the same account you use for Google Analytics.

IMPORTANT
The tracking code must be in the <head> section of the page, not in the <body> section.
> Step 2
Select the service to verify. On the verification details page of the site, choose Google Analytics and click Verify.
List of potential issues that may occur:
a) Old Google Analytics snippet
The homepage contains an older version of the Analytics code. Search Console only supports the latest version of the Google Analytics snippet. The older version of the snippet includes _gat. or _getTracker|urchin.js.
b) Google Tag Manager code found
The Search Console service found the Google Tag Manager snippet on the page but not the Google Analytics snippet. Try verifying the service using the GTM tag verification method.
c) Incorrect snippet type
Make sure you are using the Google Analytics snippet on the page. And you have access to the service within the account you used to log in to Search Console.
d) No views created
You are using the Google Analytics service without any views. To verify site ownership using Google Analytics, you must create a view in this service.
e) Insufficient permissions
You must have edit permissions for the Google Analytics service used on this site. Make sure to log in to Search Console using an account with edit permissions in Google Analytics.
We also recommend watching the official Google video tutorial:
Check out the other methods:
How to add a website to Google Search Console using an HTML file
How to add a website to Google Search Console using an HTML tag
How to add a website to Google Search Console using GTM
How to add a website to Google Search Console using a DNS Record
